Gig Performer ships with a built-in programming language GPScript that can be used to develop very sophisticated behavior for live performance. GPScript gives Gig Performer some “open endedness”, providing the ability to add features that are not already built in to the product. A full description of GPScript will require its own manual and we can do nothing more here than give a very slight taste of what is possible. In what follows, we assume the reader is familiar with basic programming concepts.
For example, anyone familiar with traditional subtractive synthesizers will be familiar with a feature known as “keyboard follow” or “keyboard tracking”. This is a mechanism where the filter cutoff frequency is adjusted automatically based on what key is being pressed and is generally used to make a sound brighter as higher notes are played. But suppose you have an LFO controlling the filter cutoff frequency and you’d like the LFO rate to increase as you play higher notes.
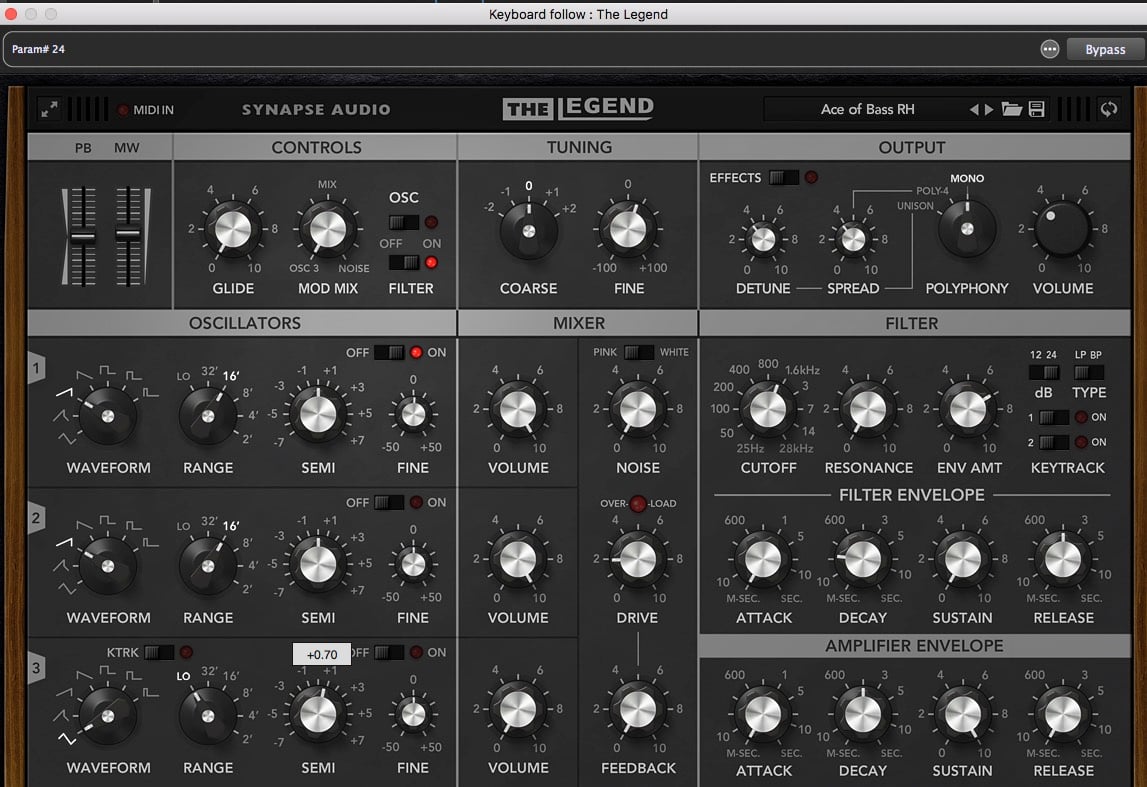
Here’s an image of an audio plugin called “The Legend”, which is (in my personal opinion) a great Minimoog emulator. If you’re familiar with this kind of synth you’ll see that filter modulation is turned on (“CONTROLS” section), the modulation wheel (MW) is half-way up and that Oscillator 3 is in its low frequency mode and not tracking the keyboard (KTRK is off). You might also notice that under the Oscillator 3 section, the SEMI (semitones) knob has been touched with the mouse, which is why there’s a tooltip above it showing a value. Also note that at the very top right there’s a label that says “Param#: 24“. Remember that, we’ll come back to this later.

Here’s a sound sample:
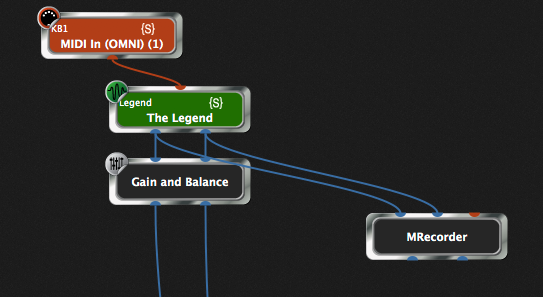
Now let’s take a look at the Wiring view in Gig Performer.

(An aside, yes, we’re using the wonderful Melda MRecorder plugin to record these sound samples. While it’s free, you can pay them a few dollars and get some really nice extra functionality)
You’ll note that the plugin block with caption, “The Legend” also has the word “Legend” above it. That’s its GPScript name and with that name you can manipulate that plugin from GPScript. The MIDI In block also has a GPScript name, KB1.
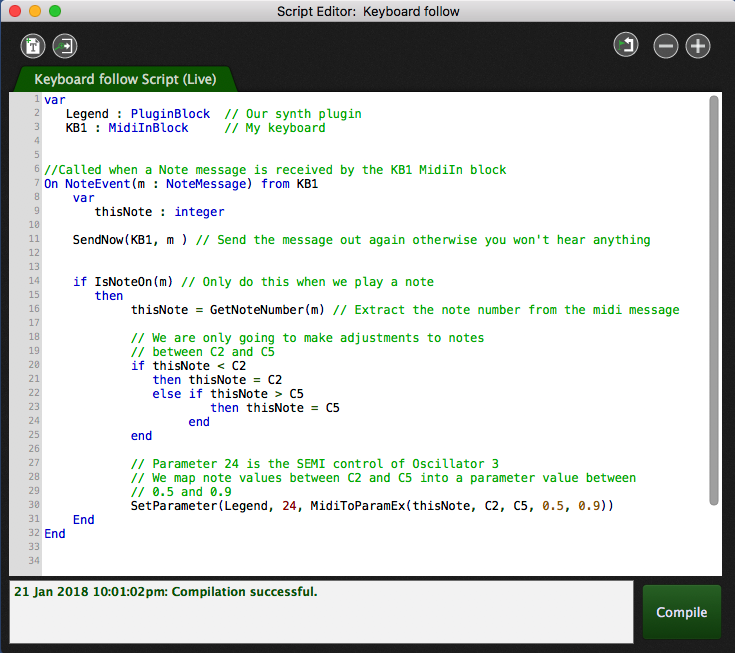
Here’s the script.

We declare a couple of variables that represent the two plugins that we want to be able to control. Following that we define a special function known as a callback and which will be run every time a MIDI note event is produced, typically by playing a keyboard. We extract the note number, make sure it is in the desired range and then we set the LFO frequency (remember SEMI and Param#24) by scaling the note number.
Take a listen.
We can of course enhance this in many ways. For example, suppose you’d also like your keyboard’s aftertouch to control the depth of that LFO rate, i.e., use aftertouch to control the Modwheel (displayed as a slider in the Legend). Well, all you have to do is add another callback that responds to aftertouch and map it to the Modwheel parameter, which on the Legend is Param# 0.
Here’s the extra piece of code which we just insert into the existing script. When an aftertouch message is received, we just get its value and map it directly from MIDI to parameter value, i.e, 0-127 goes to 0.0 to 1.0

And here’s another sound clip demonstrating this addition. (NB we’ll get around to making video demos of this stuff as soon as we can)
GPScript has callbacks for all the basic MIDI events as well as callbacks that respond to widget movements and when you change a parameter value in a plugin. Combining these callbacks with a large collection of functions to manipulate the messages, you have the ability to develop special purpose scripts to manipulate and control your performance with Gig Performer in all sorts of ways.
We will be setting up a special section of our forums to help users interested in creating scripts for Gig Performer. Watch this space.
.
Related topics:
– What is a Scriptlet?
– The most flexible MIDI processing
– Gig and Rackspace files with: scripts and Scriptlets
