Many DAWs come with a collection of (often very good) proprietary plugins for synthesis and sampling. However, proprietary audio plugins have one major disadvantage. They lock you into the DAW in which they live. If you ever need to share your tracks with others, or you just want to switch to another DAW, you have to figure out how you’re going to do without those proprietary plugins. This is the main reason we are not fans of plugins that lock you into a particular DAW or audio plugin host and we strongly recommend that you use only 3rd party VST plugins designed to work with any DAW or live performance audio plugin host such as Gig Performer.
So you’ve been using plugins from a proprietary DAW such as Logic/MainStage, Reason, Digital Performer and so on but now you’d like to use those sounds with some other DAW or with Gig Performer, typically by sampling the sounds and importing them into a third party sampler such as Decent Sampler or the almost ubiquitous Kontakt from Native Instruments.
Important note: Gig Performer v4.7 and later include the Auto Sampler feature. Check out this YouTube video to learn more.
Turns out there are quite a few ways to do this, depending on whether you’re on macOS or Windows and of course it also depends on which proprietary DAW was used. For example, MainStage has a proprietary auto sampler plugin that can be used to create new EXS instruments. Older versions of Kontakt were able to import EXS instruments directly but more recent versions no longer have that capability.
I recently helped to convert one EXS instrument to a Kontakt instrument for one of users, a well-known musician Bob Luna, and I thought it would be useful to describe the steps involved for others interested in doing the same thing. I used an application called SampleRobot to automate the capture of all the wave files and make them available in a form consumable by Kontakt. Below are screenshots of the entire process along with my commentary.
Note: if you like to watch a detailed video describing this process, check out this YouTube video.
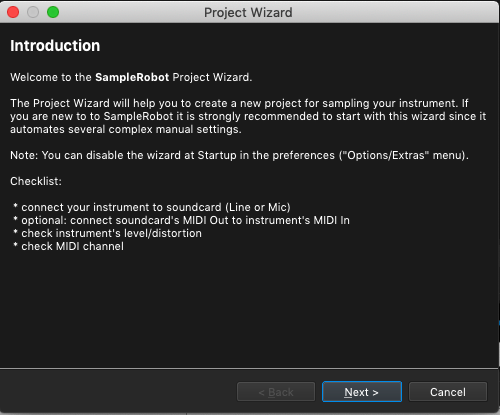
1) By default, when you start SampleRobot, you can run a Project Wizard which helps you to set up all the options to quickly get started. This is worth doing as otherwise, SampleRobot does have a bewildering number of options and things to configure.
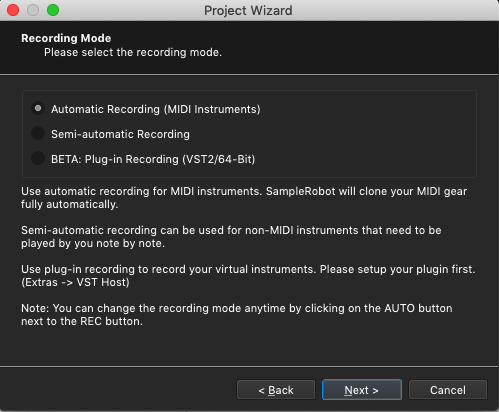
2) We are going to treat MainStage as if it were an external MIDI instrument so we select the first option. SampleRobot will consequently be able to send MIDI Note events to MainStage to cause MainStage to play the sounds we want to capture.
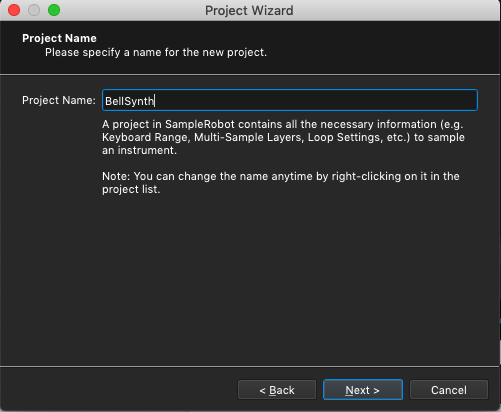
3) Whatever name you want here – I just used the name of the actual patch we want to sample
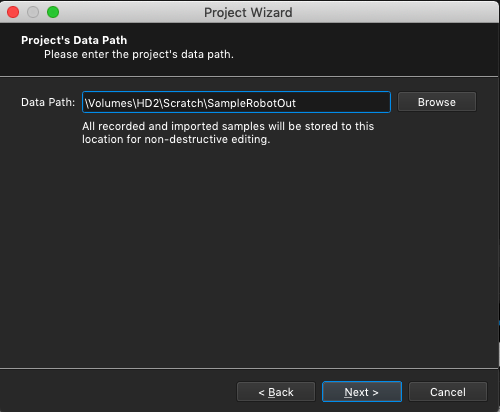
4) This option tells SampleRobot where it should store all samples that it creates
5) Now here is where things get interesting. The next wizard prompt is going to ask us to select the audio input we want to use to feed audio into SampleRobot. The problem to solve: how do we route the output of MainStage, which would normally go to your audio interface, so that the audio can be captured by SampleRobot. There are several ways you can do this
- If you have an audio interface with at least 4 analog inputs, using a couple of short cables, you could physically patch Outputs 1/2 (presumably that’s to where MainStage is sending its output) to Inputs 3/4 and then you can arrange for SampleRobot to receive audio from the same audio interface using those ports.
- If your audio interface has its own firmware mixer you may be able to create a new submix to route Outputs 1/2 to Inputs 3/4 – consult your audio interface documentation for this approach
- Use a virtual audio interface that can capture audio output from applications and route them to the input of other applications
I choose to use an application for the Mac called Loopback from Rogue Amoeba. We have written about this product before on our blog and I use it all the time to route audio from MaxMSP into Gig Performer. Similar applications are available for Windows, for example VB-CABLE Virtual Audio Device, Virtual Audio Cable. However I have not used either of these products so I am not in a position to recommend either of them, please try them out for yourselves if you’re interested.
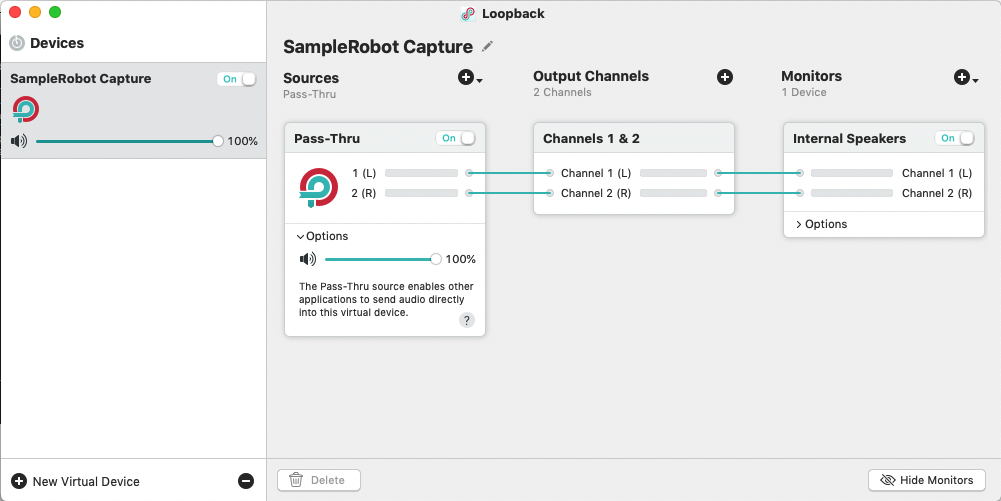
Using Loopback, I created a new stereo device which I called SampleRobot Capture. See the configuration I created in the image below. Note that as well as creating this new virtual audio interface, you can select another physical audio device to monitor what is being produced and in my case, I’m just using the Mac’s built-in internal speakers.
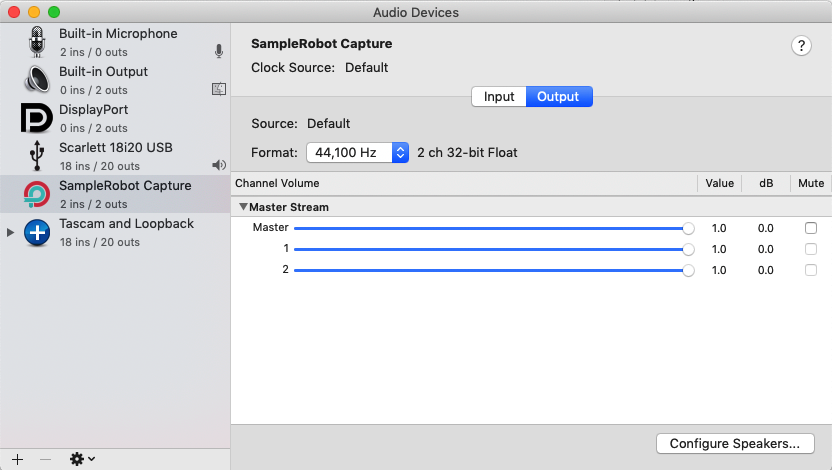
If you open your Audio MIDI Setup application (it’s in the Utilities folder under your Applications) and click in Windows | Show Audio Devices, you can see that now there is a new audio interface in the list, called SampleRobot Capture. As far as your Mac is concerned, that device looks just like any other audio device and is available to any application that needs it.
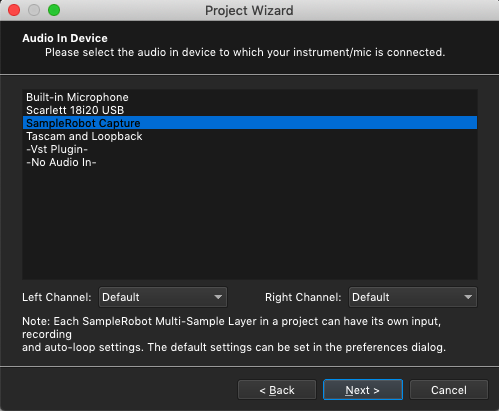
6) OK – back to the SampleRobot Project Wizard where we now select the desired Audio In Device, which of course will be that SampleRobot Capture virtual device.
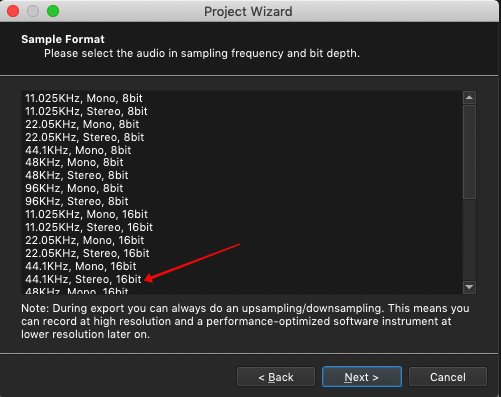
7) I routinely use 44.1KHz Stereo so I selected that option for the Sample Format
8) The next problem we have to solve is how to to feed MIDI from SampleRobot to MainStage. On a Mac, this is easy as OS X has built-in support for IAC (Inter-Application Communication) MIDI ports. Open your Audio MIDI Settings application again and this time click on Windows | Show MIDI Studio. One of devices there will be called IAC Driver.
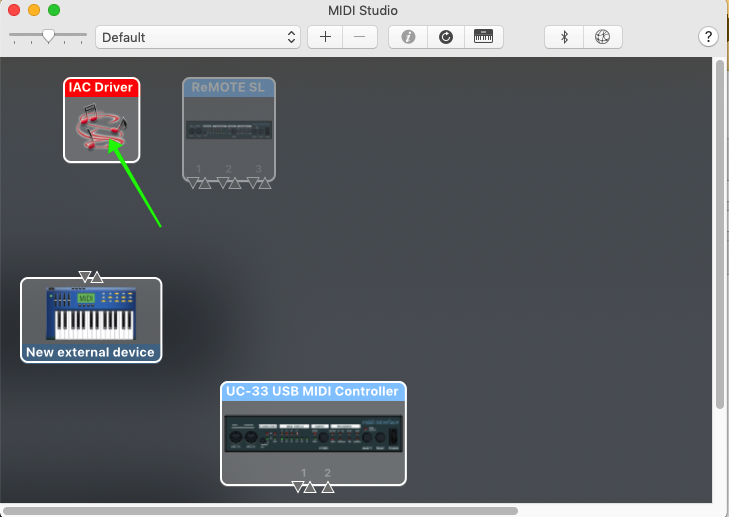
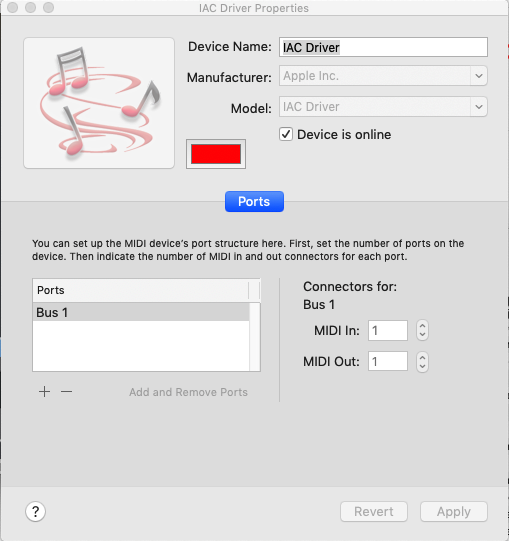
Double-click on that IAC driver to open up the IAC configuration. You can change the name of the device if you want, although I didn’t bother. Make sure there is at least one Port (the default will be named IAC Bus 1 (I renamed it to just be Bus 1), if it’s not there, click on the + sign below the Ports list to add it). Also make sure to check the box called Device is online. Click Apply. You have now created an internal MIDI device and you can send MIDI data from one application to another (assuming of course both applications support MIDI).
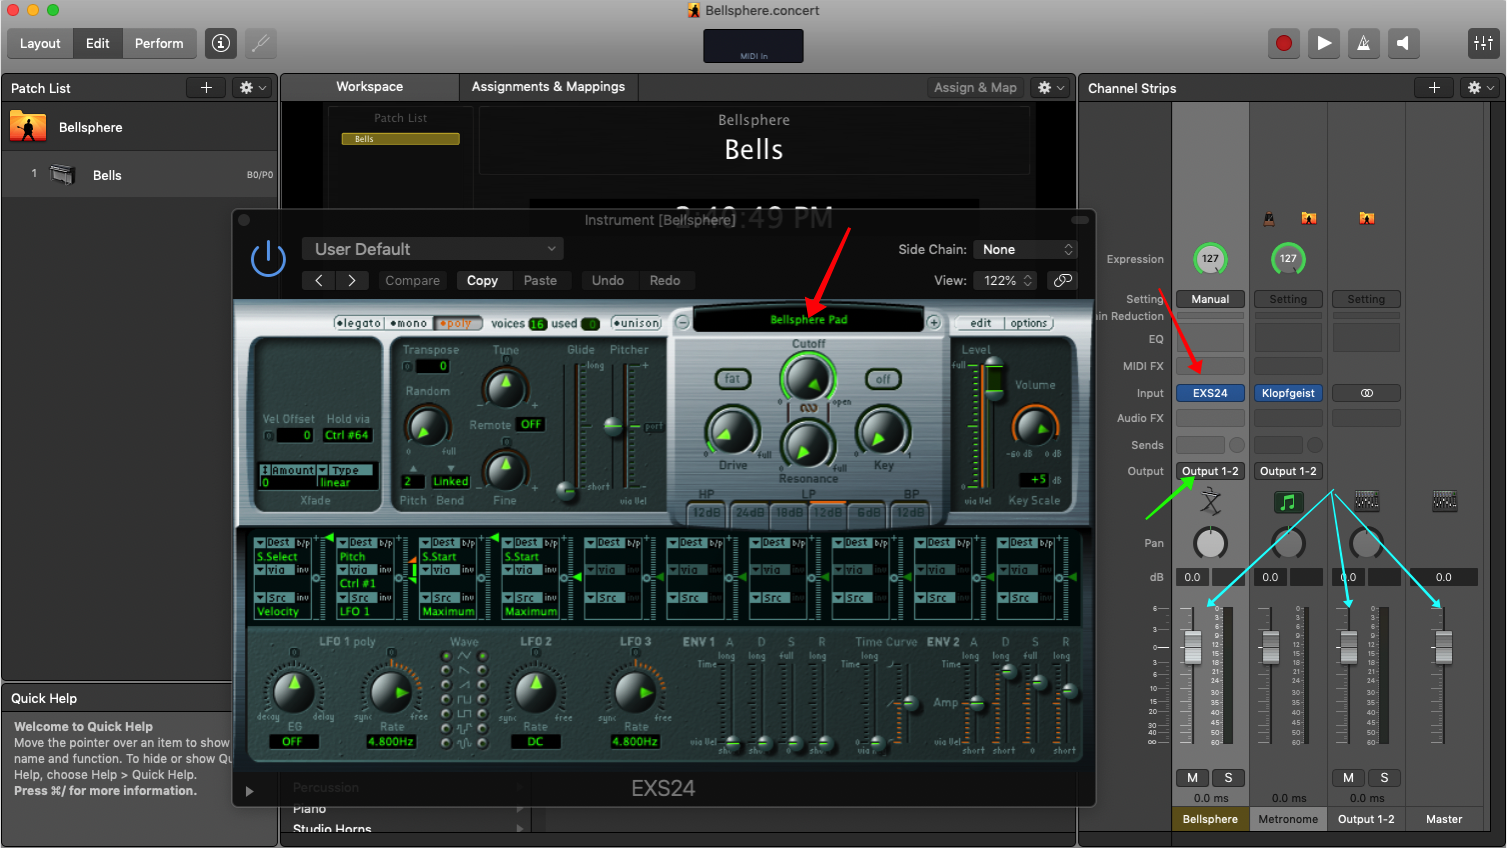
This is a good time to make sure that you everything is prepared in MainStage as well. First make sure the sound you want to sample is loaded (Red arrows) and going to Output 1-2 (Green arrow) and that all the faders are at 0db (Cyan arrows). Also, unless you want them in the raw samples, make sure you turn off any modulation (filter modulation, ADSR, vibrato effects and so forth). You’ll add those back in using Kontakt functions instead.
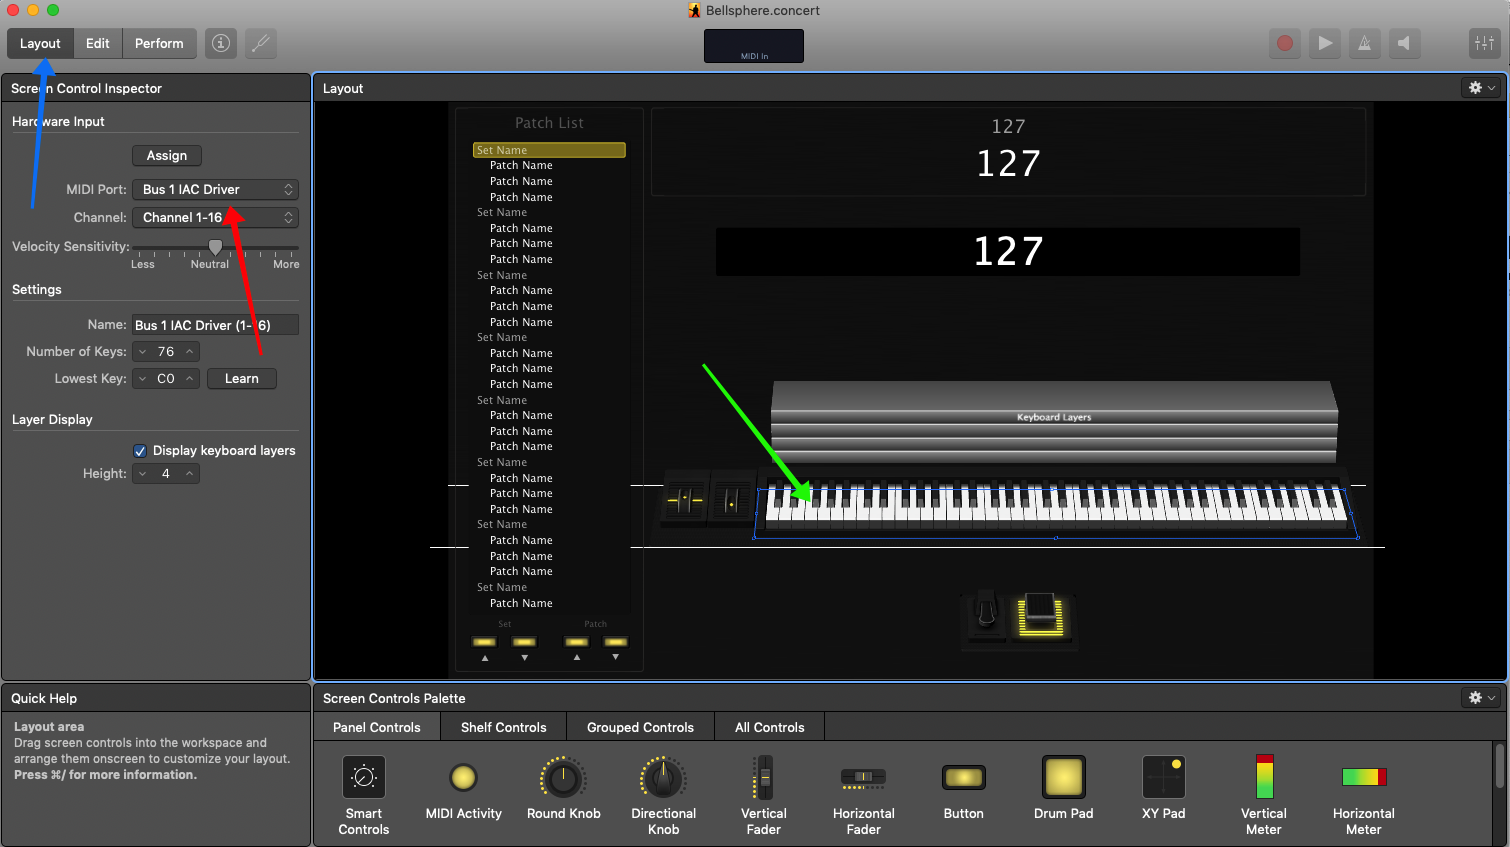
Optional – click on Layout mode (Blue arrow), then click on the keyboard (Green arrow) and then finally select the IAC Driver (Red Arrow). The reason this is optional is that by default MainStage listens on all channels and so will pick up the IAC port automatically.
Then make sure the sound you want to sample is loaded
9) Back to the SampleRobot Wizard again, and here just select the new virtual MIDI device from the list.
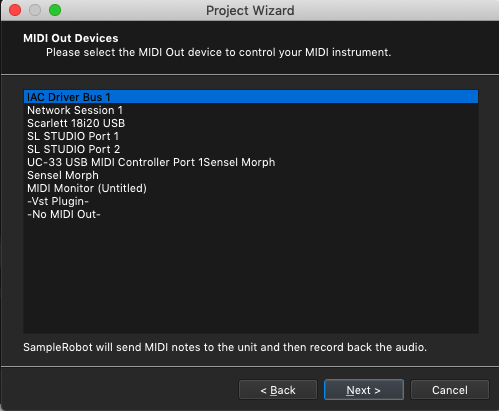
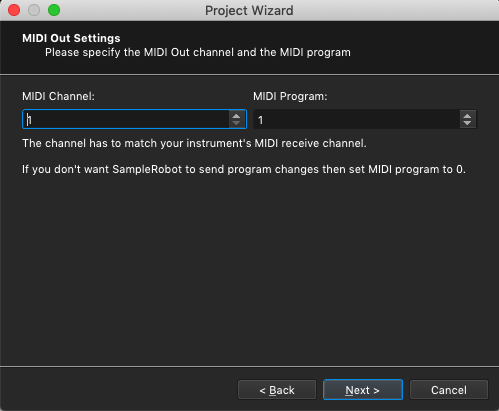
10) Next, just accept the defaults here. MIDI events will be sent on MIDI channel 1.
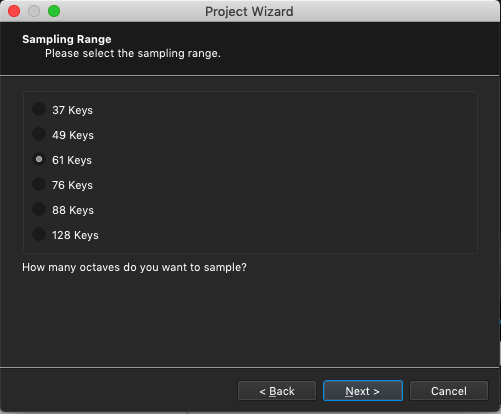
11) This one is your choice – depending on the instrument you’re capturing, you may need a smaller or large range of notes. If you’re not sure, pick a bigger number (although this will cause the process to take a bit longer since there are more notes to be sampled) since you can always delete samples you don’t need later.
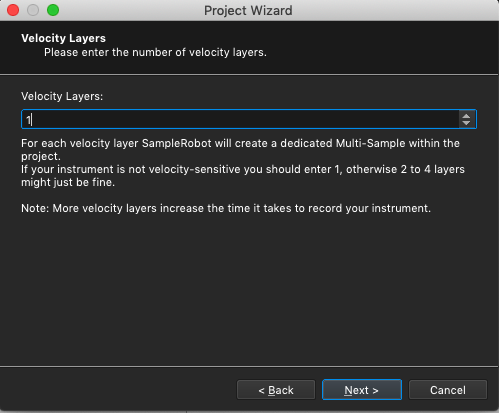
12) Again, the number of velocity layers you need really depends on the instrument. Questions that are relevant to your choice here include
- Is the instrument you’re capturing velocity sensitive? For example, most organs are not velocity sensitive so one layer is sufficient (and you’ll need to adjust your sampler later so that it does not play the samples louder if you hit the keys harder)
- Other than volume, does the timbre of the sound change significantly as the velocity increases. If it doesn’t, then 1 layer is still probably sufficient. If the timbre does change, then you’ll want to select more layers, the actual maximum depending on how sensitive the timbre changes are to different velocities. Note that if you select more velocities, the note will be sampled multiple times, thereby adding to the total time needed to capture the instrument
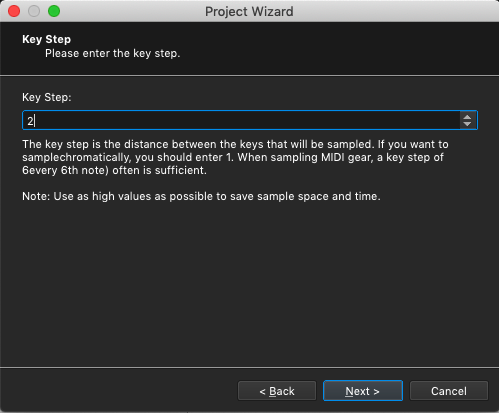
13) You can choose to sample every note or you can just sample every nth note and have the sampler interpolate the notes in between. The right selection again depends on the kind of sound you’re sampling. If the timbre changes significantly as you play different notes, then you may want to sample every note. If it doesn’t change that much, then you can get away with sampling fewer notes, thereby saving some space. One tip: if the sound has some built-in motion, such as tremolo or vibrato, you’re going to want to sample every note. This is because the process that most samplers use to pitch shift will end up changing that tremolo or vibrato rate so that notes near each other end up having different rates, which will sound strange. I generally pick 2 but you’ll want to experiment with this as you become more familiar with the whole sampling process.
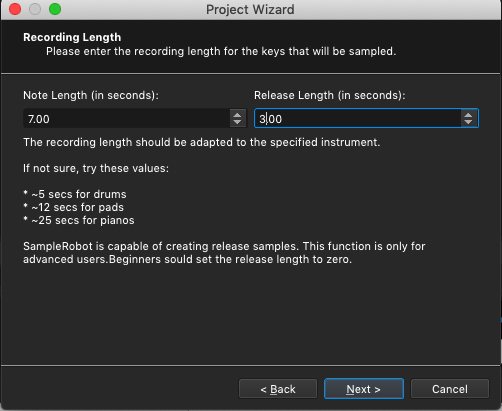
14) The suggestions provided in this particular dialog are useful rules of thumb. If the sound evolves, you’re going to want use a longer note length than if the sound doesn’t really change much.
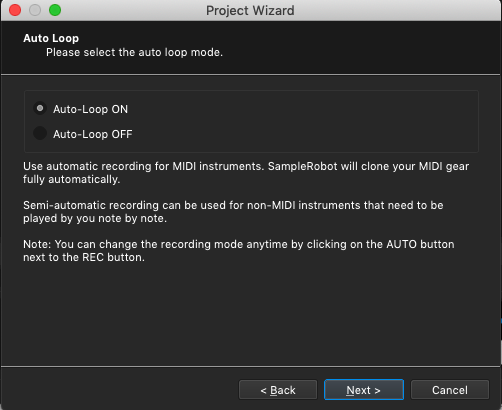
15) Creating decent loops can be quite complicated depending on the sound and how it changes over time. But to get started, just enable Auto-Loop and see how it sounds
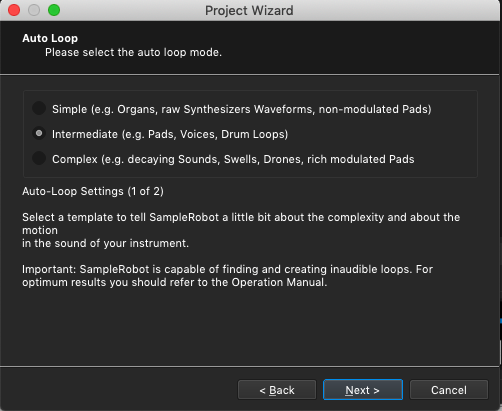
16) This options gives SampleRobot some hints about the kind of sound being sampled which helps it to choose the right algorithms for detecting loop points.
17) Again, this is something with which you’ll have to experiment to figure out what works best for you. Clearly, how the sound evolves (or not) will determine where you want looping to start.
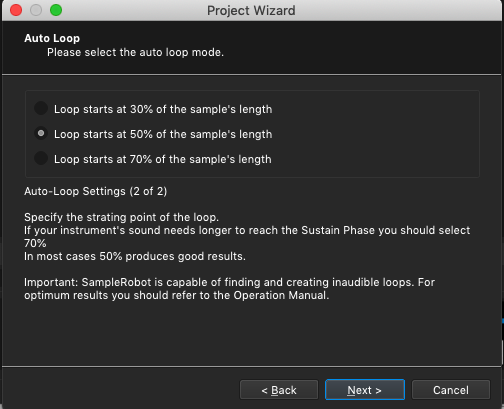
18) OK – we’re ready to go
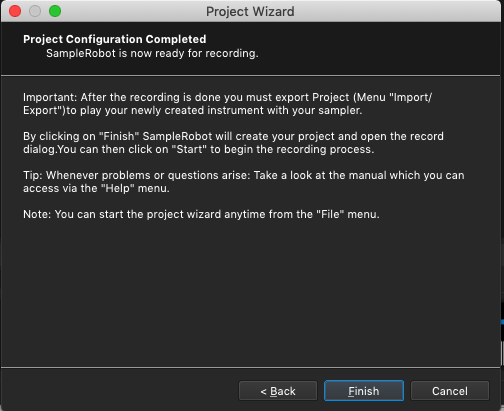
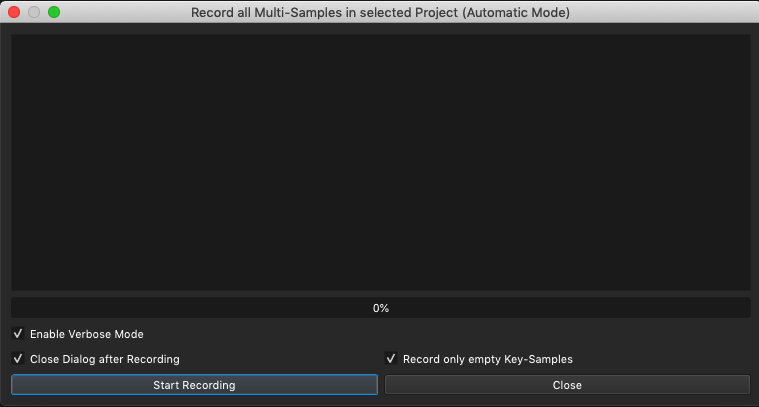
19) Click on the Start Recording button
20) You’ll start to see information about what’s being created and this will continue throughout the sampling process
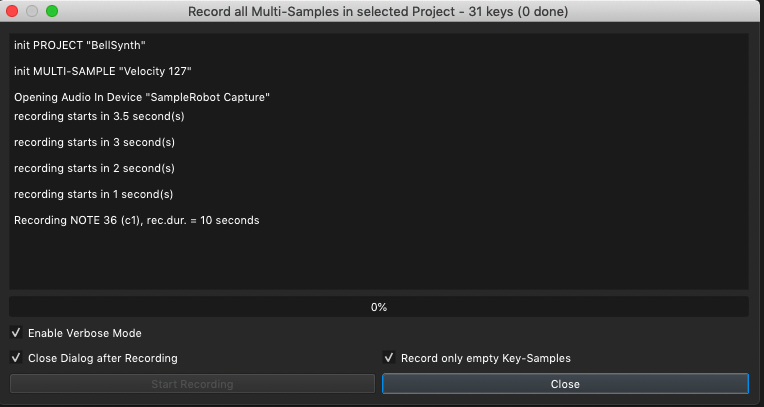
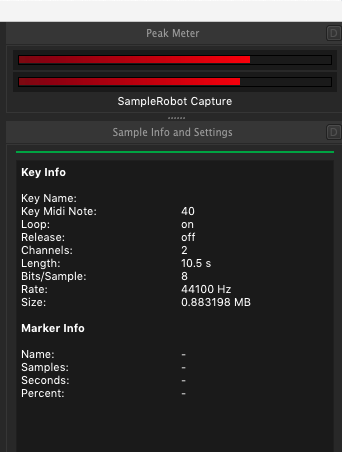
You should also be able to see the meters flashing indicating that sound is coming through. If you used Loopback according to the instructions above, you should also be able hear the sound through your computer speakers
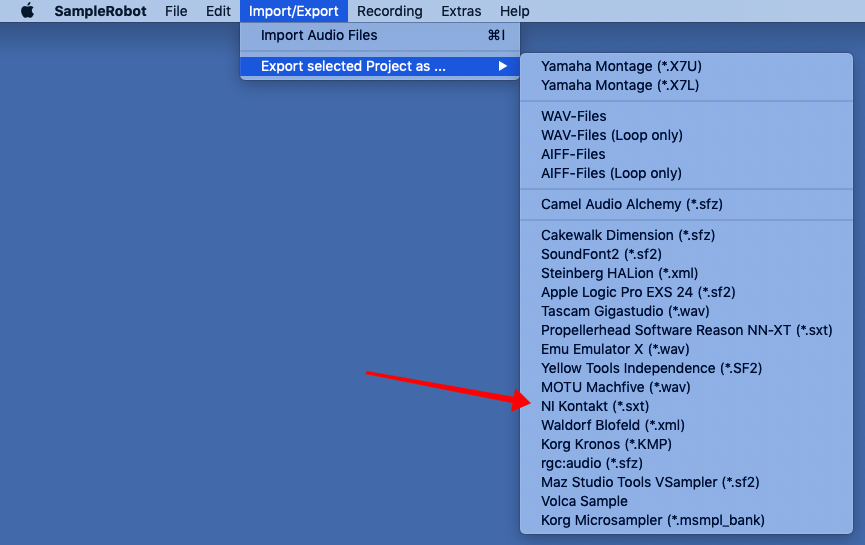
21) Once the sampling process has completed, click on the Import/Export menu item and click Export selected Project as … and then select NI Kontakt as the target sampler format.
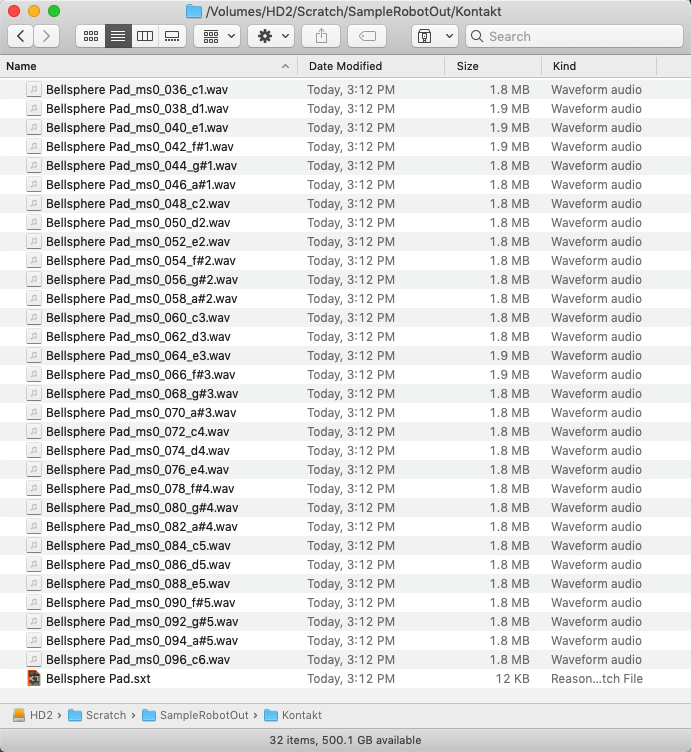
If you open the folder where SampleRobot was storing the sample files (see step 4 above), you’ll see all the samples as well as an “.sxt” file which you’ll import into Kontakt.
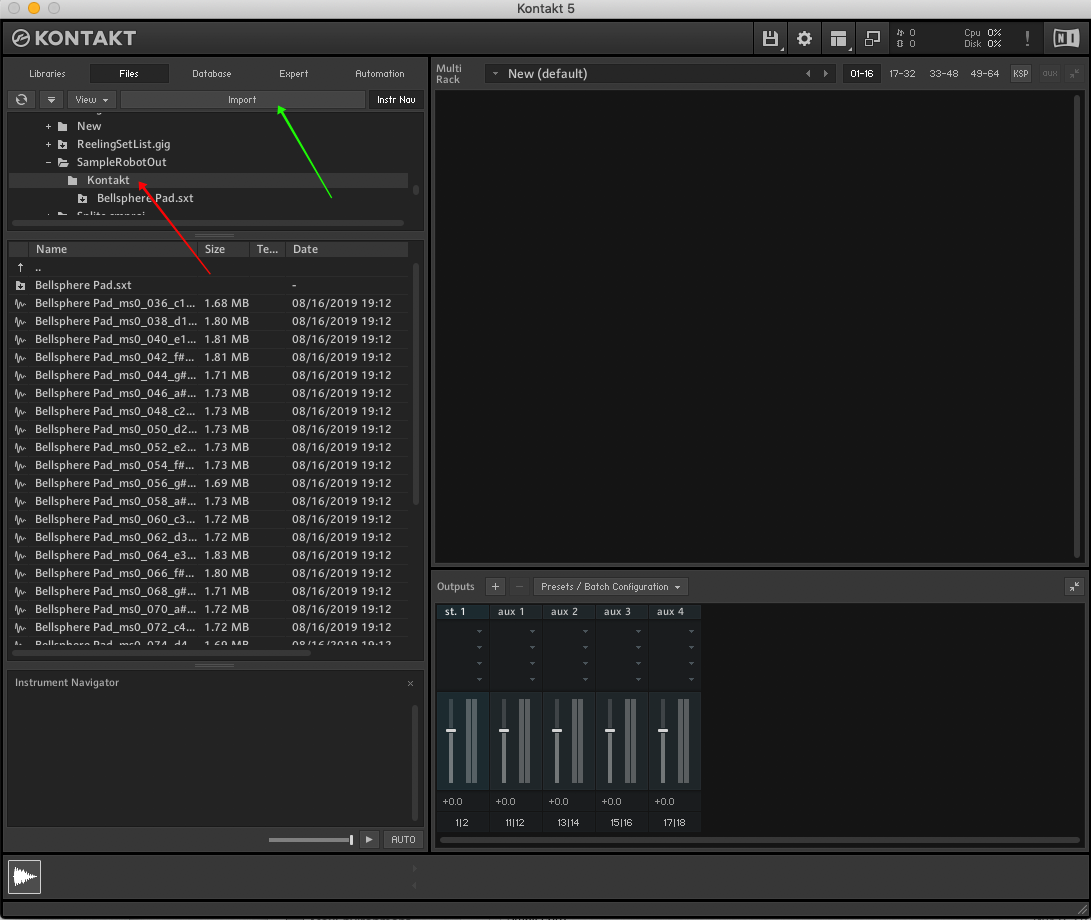
22) Open Kontakt – it’s more convenient to use the standalone version right now
- Click on Files
- Navigate to the folder where the .sxt file was stored. In my example, I stored it in a folder called Kontakt inside the SampleRobot output folder (Red arrow)
- Click the Import button (Green arrow)
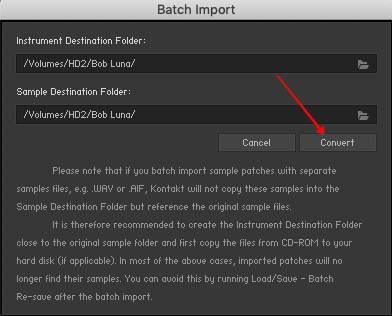
23) You will be prompted to define the location where you want the instrument (a Kontakt .NKI file) and the samples to be stored. In my example, I stored them in a folder called Bob Luna. Click the Convert button (Red arrow). It turns out that sample files don’t actually get copied and the NKI file just references them where they were originally stored by SampleRobot. We’ll fix that in a moment.
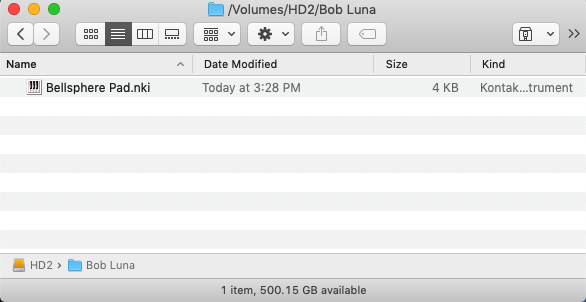
24) Open the folder that you specified above. You should see the NKI file stored there. It’s only 4Kb as it doesn’t actually contain the samples, it just has a reference to where they are.
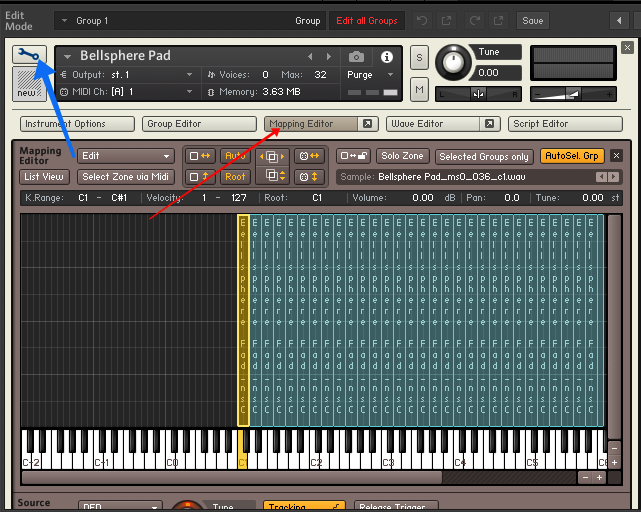
(25) Double-click on the NKI file and the instrument will be loaded into Kontakt. If you click on the wrench (Blue arrow) and then on Mapping Editor (Red arrow), you’ll see all the loaded samples.
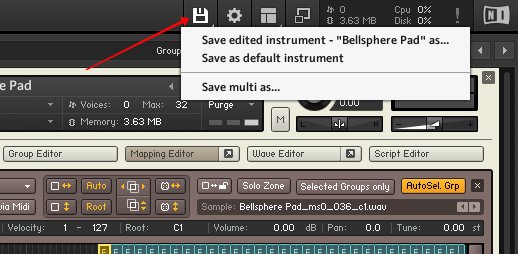
25) Click on the Save button (Red arrow) and then click Save edited instrument … as…
26) Use the same name but click on Monolith (Red arrow). This causes the samples to be saved inside the NKI file. Click the Save button
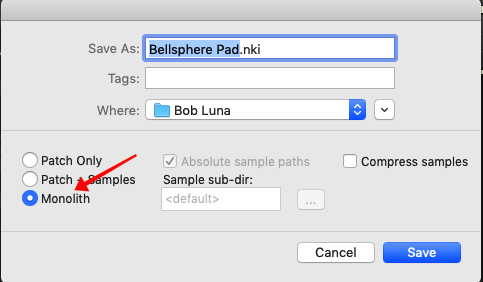
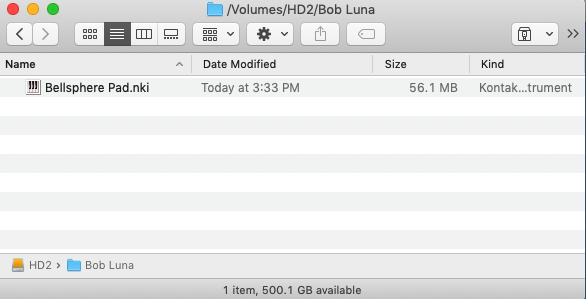
27) You’ll see that the NKI file is now much larger because it includes the samples.
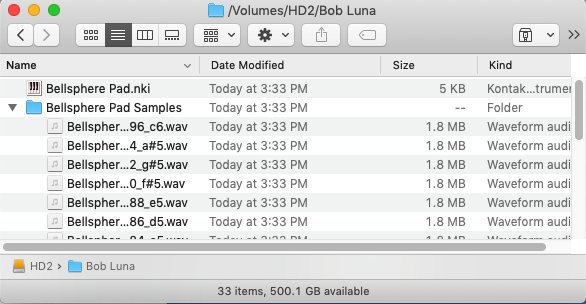
27a) Alternatively, if you clicked Patch + Samples instead of Monolith, the samples will be stored in the same folder as the NKI file but separately.
You can now edit/tweak your new Kontakt instrument, perhaps replicate the modulations that were in the original sound using Kontakt parameters.
Phew – we’re done — hopefully the information above will get you started on the road to capturing the sounds you need from other systems so as to be able to use them in Kontakt.
